Tuesday, September 19, 2017

The Original - 1955 BMW Isetta 300

I started off modeling the original BMW Isetta from a blueprint and photographic reference, and once I completed the vehicle I reworked the shape and proportions to make a stylized or caricature version of it.


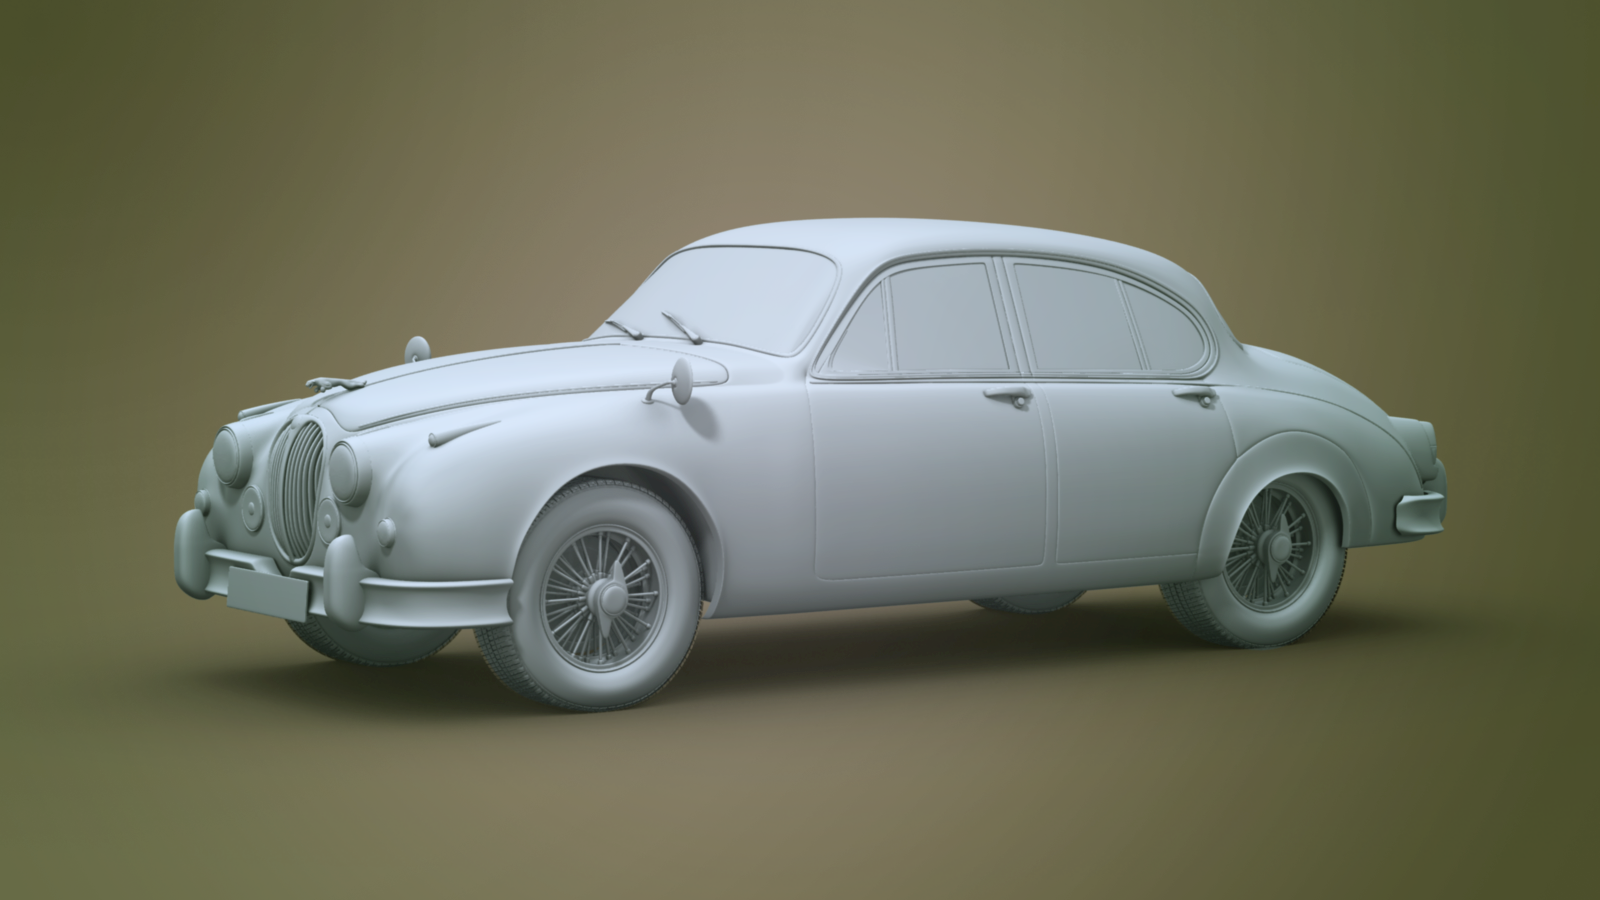
The Original - 1959 Jaguar mk2

I started off modeling the original Jaguar from a blueprint and photographic reference, and once I completed the vehicle I reworked the shape and proportions to make a stylized or caricature version of it.


The Original - 1969 Camaro SS 350

I started off modeling the original Camaro from a blueprint and photographic reference, and once I completed the vehicle I reworked the shape and proportions to make a stylized or caricature version of it.


Monday, July 17, 2017

1969 Camaro SS 350


A stylized 1969 Camaro SS 350.
I was influenced by the designs of drag racers - exposed engine, custom body work and
different size tires.

Using Substance Painter for the first time - really cool powerful package.
Modeled in Softimage and 3DS Max, rendering using VRay.
Textures created in Substance Painter, and composite done in Adobe Photoshop.


Monday, April 3, 2017

1959 Jaguar MK2

A stylized version of a Jaguar mk2. I was inspired by the stylized Isetta I created a little while back. Modelling, lighting and rendering done in Adobe Softimage. Textures created in Adobe Photoshop. Also playing around with some atmospheric smoke.


Friday, November 25, 2016

Getting into Character

One of the fun and challenging aspects of this type of project is coming up with a unique scenario to go with the audio. Sometimes the scene just pops into my mind and other times I've got to work hard to develop it.

For this 11 Second Club audio, 2 female characters were working through a situation.
These are some of the main points I needed to work out in order to come up with the animation:
-  Whats going through their heads as they reacted to the dialogue of the other character?
-  They go through emotional changes, what are they and what do they look like?
-  How do I compose the scene to best show the emotional changes and interactions.

I came up with these emotional/character traits for the characters which helped me compose the shot
Mom: authority, rule breaker, problem solver, confident
Girl: shy, nervous, inquisitive.

- View the final animation below -


Wednesday, December 9, 2015

My Custom Bike Build: Part 4

This is my rebuilt Honda cb400f.
Thank you to Devin, Neil and Alan from the WoodstockMancave and everyone else who helped me to complete this project.

To read about the rebuild process follow the links below:
My Custom Bike Build: Part 3

The absolute cherry on came when the Woodstock Mancave put on its annual Garage Built Show in December. The streets were filled with bikes and bike enthusiasts along with pro bike builders showing off their latest creations. Then there was the private or non-professional garage built bikes which were all listed and entered into their competition for the best bike build. My bike was entered and landed up winning the best bike award!! I was totally blown away by this prize and recognition.


My Custom Bike Build: Part 3

Strip down, clean, polish, paint and reassembly.
We had the bike 90% stripped in one day. I made sure to take pictures as I was pull it apart and to label things and put bolts, nuts, washers etc. in marked ziplock bags.

Alan gave the engine a great steam clean and helped me polish some of the parts. I am fortunate in that the wheels are in really good condition. The chrome shone bright with a little polishing and the wheel hubs came out really well with some metal polish and a fair amount of elbow grease.


 Reassemble went very smoothly, a little patience to label parts and bits went a long way. I've listed all the things that were done before reassembly below

- Powder coat frame, swing arm, both stands and the triple tree, handle bar and rear mudguard -
- Replace wheel bearings for front and rear wheels -
- Replace master cylinder -
- Attach new indicator lights and tail light -
- Replace fork seals -
- 2 new tires -
- New exhaust pipe -
- Made new side covers from fibre glass -
- Clean and polish wheels, wheel hubs, chain, exhaust headers, front forks, rear shocks -
- Replaced a bunch of seals -
- Vapour blasted 4 engine cover panels, not the engine -
- Respray petrol tank(thanks to Jamie) and fit 3D printed logos -


I have a mate who has a 3D printer, so I designed the Honda logo in a 3D program, then sent it off to him to get printed. I think it turned out really great. Lastly just a little hint of the final tail end.


 Once the bike was fully assemble the real trying part started... getting the engine running properly. I'm not saying I'm an expert in this department but I've learnt so much about tuning the engine. Pulling the carbs apart, cleaning, reassembly, and repeat. Adjusting air screws, idle screw, balancing carbs, measuring valve pressure, adjusting valve clearance. So much to learn, but it has taken me this whole process to be confident to try and do this on my own.

Thank you to Devin, Neil, Alan at the WoodstockMancave and everyone else that assisted along the way. It's been an amazing experience. Now time to ride!!